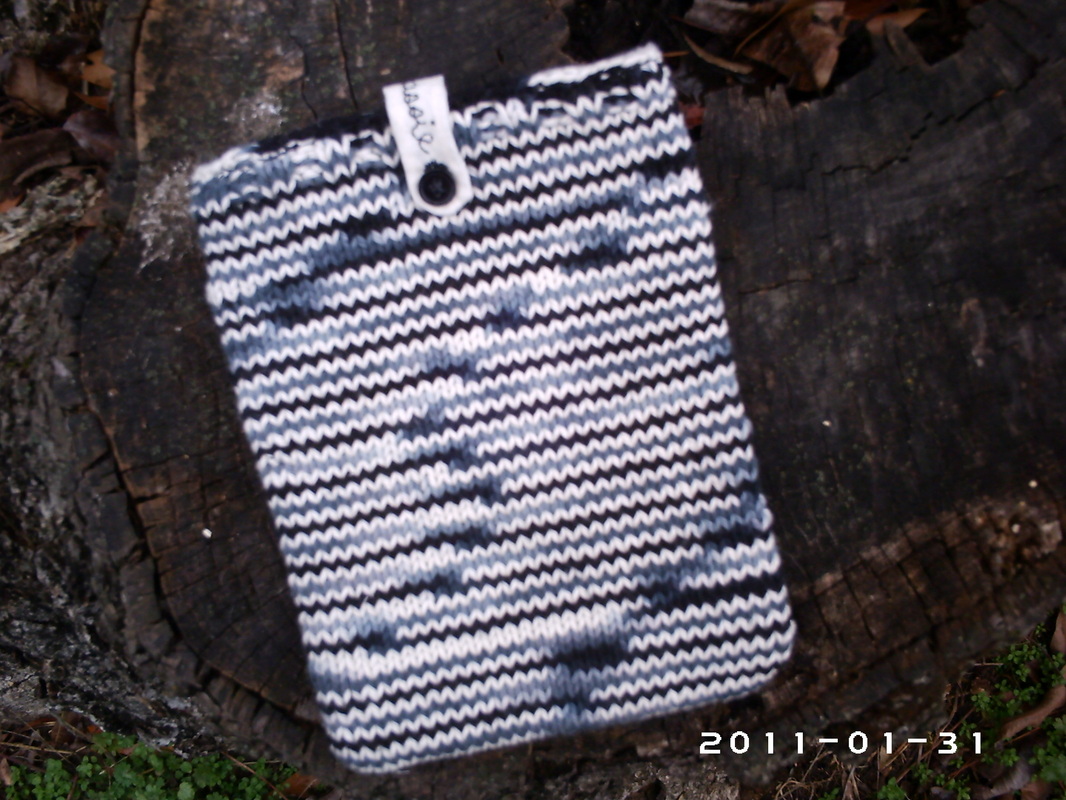
2nd Generation Kindle Cover w/Lining (for the Amazon Kindle)
Click the link below to download this pattern to your computer.
| 2nd_gen_kindle_cover.txt |
This is more of a tutorial or a guide on how to make this object than a pattern. Instructions are included to make the cover fit your specific Kindle. I highly suggest you follow these directions and measure your Kindle because the Kindle I made this cover for has a snap-on back decorative panel that made it slightly larger than its original dimensions.
Also note that I wrote up this guide after making the cover, so there are no progress pictures. I have tried to explain my process as clearly as possible, but if you still have troubles, don't hesitate to contact me and ask them! I would be happy to explain it in a different way. You can find a contact form on the About This Girl page.
Now, we can talk about how to do this. You will need a few things:
- yarn: this one is obvious; you can use any yarn you'd like, although I'd suggest something hard-wearing, durable, and easy to clean like kitchen/dishcloth cotton. Also, if you are not planning to line this, pick a very low-fuzz yarn. I used a worsted weight dishcloth cotton for the one you see in the photo; you don't have to use worsted weight, but if you don't, then it's absolutely critical that you measure your Kindle and your gauge to figure out how many stitches to use.
- yarn needle: for weaving in the ends
- button: if you plan to use a button-closure
- crochet hook: same size as your needle; or a DPN the same size as your knitting needles
- needles: the size all depends on the gauge you want to achieve. The band of the cotton I used suggested a US 7, so I made three swatches with US 7, 6, and 5 needles. I preferred the US 5 needle fabric, so I used those. This tutorial is written assuming you are using one circular needle and the magic loop method. You will need a second circular needle as well, but it can be in a size smaller than the ones used for your project.
- fabric: if you plan to line the cover. I used a plain, thin, cotton muslin fabric for this one because it's all I had. However, you could use a pretty fabric in contrasting or complimentary colors--whatever you'd like. Just make sure it isn't fuzzy, has been washed and pressed before using it.
- sewing notions: these are kind of obvious. You need matching thread (I would match the yarn, not necessarily the fabric), a sewing needle (if sewing by hand), a sewing machine and its accessories (if sewing my machine), scissors, iron.
Once you have everything you need, you can get started.
1. Your first step is to measure your Kindle. Measure the length, width, and thickness. The Kindle this cover was made for had a decorative snap-on backing that made it thicker, so my measurements probably aren't the same as your's. This Kindle measured 15.5 cm wide by 21 cm long by 1.5 cm thick. Measure on the high side--if it's really close, go up to the next mark.
2. The next step is determining your gague with your yarn and the needles you will use. Knit a swatch about 8 cm square and measure in the middle of the piece. My gauge was about 2 cm = 3.75 stitches.
3. Since the cover will turn out flat, you need to account for the thickness of the Kindle in your measurements. The width of the finished case needs to be the width of the Kindle plus the thickness. So this case needed to be 15.5 cm + 1.5 cm = 17 cm wide. Since my gauge was 2 cm = 3.75 stitches, just take your needed width (17 cm), divide by 2, which gives me 8.5. Then, multiply by your stitch gauge, mine was 3.75. This gives me 31.8, which I rounded down to 31 stitches. This is how many stitches will be on each side of the cover. You will be casting on this number of stitches twice, as explained below.
4. Begin by provisionally casting on this number of stitches (mine was 31) with a bit of scrap yarn. Then, provisionally cast on the same number again onto the same needles, but with a different piece of scrap yarn. You should have two strips on one circular needle, joined only by a small piece of knitting yarn in the middle. Their joint should be to the left, the needle tips to the right with the working yarn coming from the first stitch of the back needle. You are set up to begin working in the round using the magic loop method.
5. Begin working in the round using the magic loop method. Purl the first 10 rounds (because your project is currently inside out).
6. Drop your current working yarn and needles and turn your project so the provisionally edges are up. Take your second circular needles (can be a size smaller than the others you were using) and, beginning at the start of the round, working in the direction you normally would when knitting, carefully unpick the provisional cast-on on the front side while catching the resulting live stitches. Don't knit these stitches, just catch them on the new needle.
7. When this side is all taken up, pull your circular needle through so the second needle tip is in or near those picked up stitches. Turn your work so you are looking at the other side, your circular needle is coming from the back on the right side, the end of the round is on your left. Again as before, unpick the provisional cast-on on this side, catching the resulting live stitches. When finished, you should have both needle tips pointing in the same direction, towards the start of the round.
8. Take up the yarn end from the other end of the skein of yarn, not the one that is currently attached to your project.Turn your work so that the needle tips are pointing to the right and it looks like you are about to start a round using magic loop. You are going to work a three-needle bind-off along this edge. Take a crochet hook or a same-sized DPN, insert it into the first stitch of the front needle as if to knit, then into the first stitch of the back needle as if to knit. Leaving a 4" tail, bring the yarn through both stitches. Insert your hook/DPN into the second stitch of the front needle as if to knit, then into the second stitch of the back needle as if to knit, and pull up another loop of yarn. You now have two loops on your hook/DPN. Pass the first over the second. Continue in this way to the end of the row, leaving a tail long enough to weave in, clip the yarn.
9. Now you can turn the piece right-side out so that this seam is on the inside and stockinette is showing on the outside.
10. Go back to where you left off before (after the 10 purl rounds; they now look like 10 knit rounds). Knit around and around in stockinette until your piece is about 2 cm shorter than the length of your Kindle. (In my case, I knit until it measured 19 cm).
11. Finish in any kind of edging you like--garter stitch, ribbing, or seed stitch all look nice. I used a 2x2 ribbing for this one, not for a stretchy edge, but for the look of it. Bind off all stitches around, weave in all ends.
Now you are ready to make the lining, if you desire. At the time I made this one, I did not have a sewing machine, and thus hand-stitched everything! If you have a sewing machine, I recommend using it for this as it will go much faster. Keep your iron handy so that you can press all seams. I would press them all open to give it a better fit.
Also, the instructions below will give you a buttoned flap closure as seen on the picture at the top of the page. If you would like some other closure, you'll have to design it and make it yourself.
1. Cut your fabric. Use the measurements of the Kindle plus 1 cm on each side for seam allowance. I cut two identical pieces that were 20 cm by 24 cm. Be sure to mark where your stitching will be; pin in place vertically along the marks and try to put your Kindle in it. If it doesn't fit, adjust accordingly!
2. Holding right sides together, backstitch around your marks leaving one of the short sides open. Don't forget to lock in your stitches if using a machine. Press the seams open.
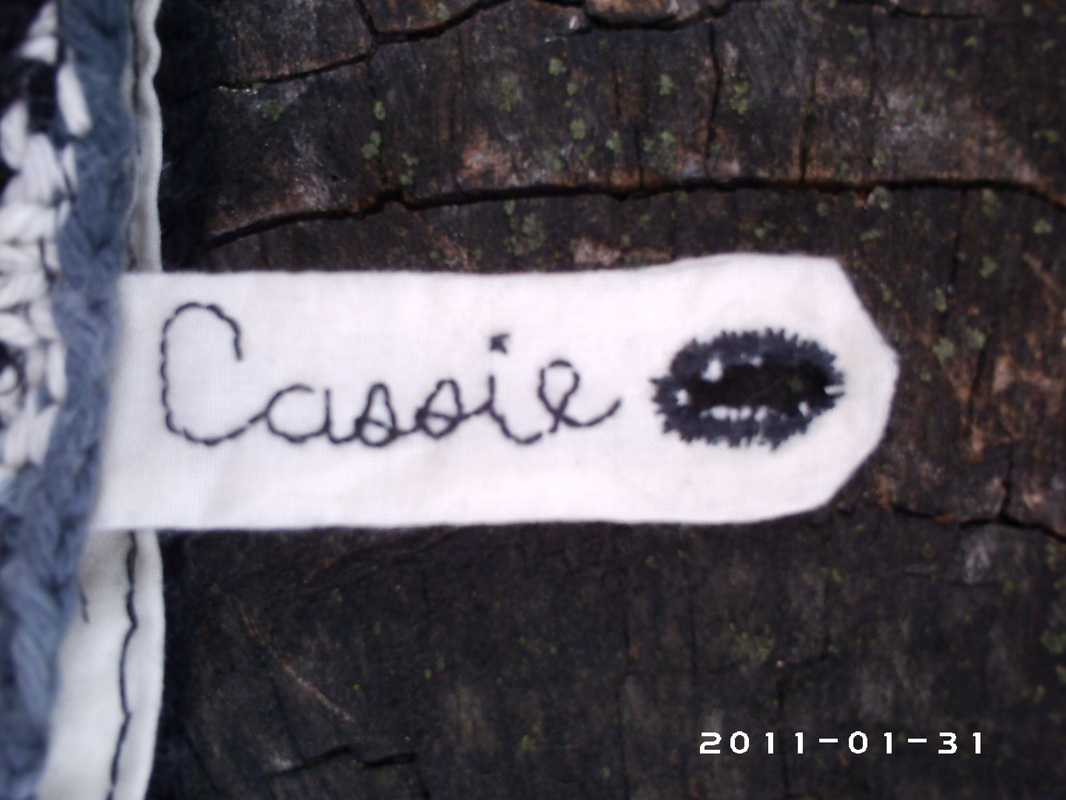
3. Set this lining aside and get your button and some fabric scraps. Fold a piece (about 6" by 6") of fabric in half and pin the edges to keep it still. Draw out a rectangle on the fabric that is about 8 cm long and 4 cm wide. (If you'd like to do any embroidery, it should be done now on one piece with pencil marks on the back. I made 4 little marks with x's of thread where the corners of my rectange were so that, from the right side, I could see where to place my stitching.)
4. With the right sides together, backstitch along your marks leaving one short side open. Cut out, leaving a small seam allowance (about 1/4 cm). Cut in the corners and press seams open.
5. Now you need to flip this right-side out. If you have a very small steel crochet hook, it works best. Insert it into the tube, punch it through the fabric or a stitch on the other end, and slowly ease it through, rolling the fabric on top of it. Otherwise, you can use the rubber tip of a pencil or even a safety pin. When it's right-side out, press it flat.
6. Sew a buttonhole that is appropriately sized for your button.
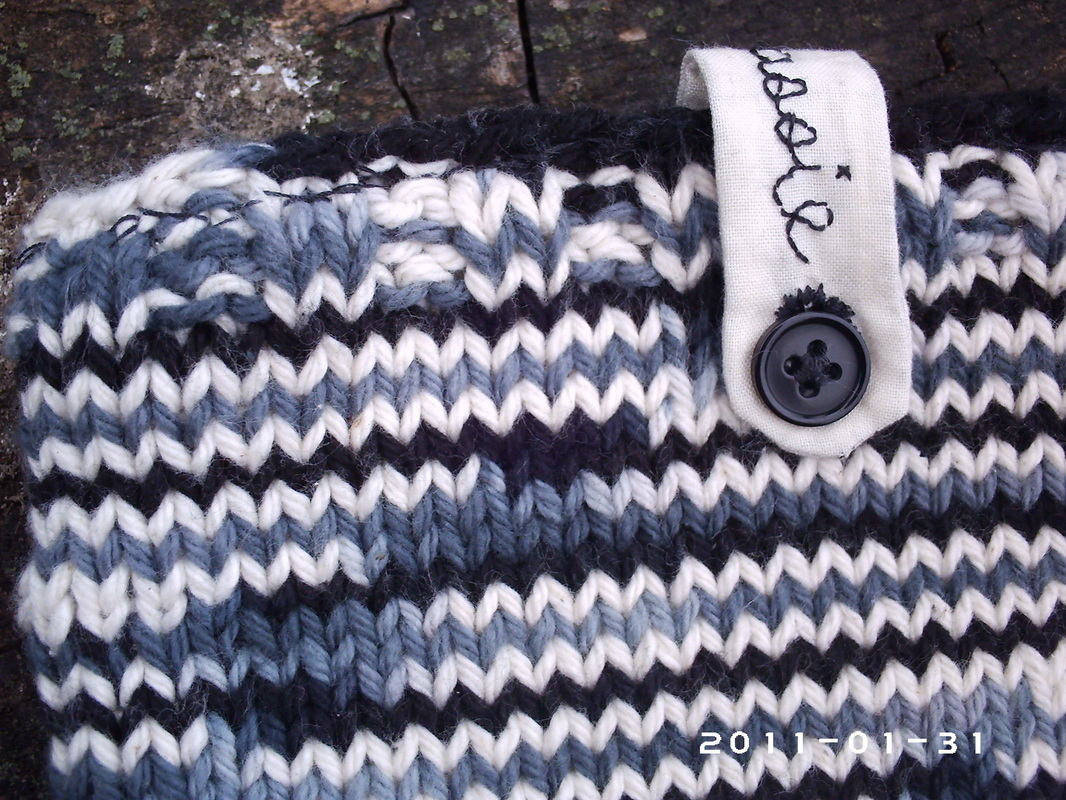
7. Put the lining into the knitting, fold the raw edge under between the fabric and knitting, pin them together. In the center inside back cover of the case, pull out a pin, put in the raw edge of the buttonhole flap, and re-pin to hold together. Gently fold the buttonhole flap over to the front of the case to pick a place for your button. Leave enough give for the top of the Kindle. Place a pin or something to mark where this button will go.
8. Remove only the pins holding the front of the cover to its lining and sew the button onto the knitted fabric.
9. Once your button is attached, repin the lining to the cover. Backstitch around the inside edge of the case to attach the lining. Sew as closely to the edge as possible for a neat finish.
And that's it! You should have a lined cover for your Kindle. Test it out. If it doesn't fit, determine if the cover or the lining is the problem. If it's the lining, rip out the seams and try again. If it's the cover, detatch the lining from the cover, unravel the cover and try again.
Also, the instructions below will give you a buttoned flap closure as seen on the picture at the top of the page. If you would like some other closure, you'll have to design it and make it yourself.
1. Cut your fabric. Use the measurements of the Kindle plus 1 cm on each side for seam allowance. I cut two identical pieces that were 20 cm by 24 cm. Be sure to mark where your stitching will be; pin in place vertically along the marks and try to put your Kindle in it. If it doesn't fit, adjust accordingly!
2. Holding right sides together, backstitch around your marks leaving one of the short sides open. Don't forget to lock in your stitches if using a machine. Press the seams open.
3. Set this lining aside and get your button and some fabric scraps. Fold a piece (about 6" by 6") of fabric in half and pin the edges to keep it still. Draw out a rectangle on the fabric that is about 8 cm long and 4 cm wide. (If you'd like to do any embroidery, it should be done now on one piece with pencil marks on the back. I made 4 little marks with x's of thread where the corners of my rectange were so that, from the right side, I could see where to place my stitching.)
4. With the right sides together, backstitch along your marks leaving one short side open. Cut out, leaving a small seam allowance (about 1/4 cm). Cut in the corners and press seams open.
5. Now you need to flip this right-side out. If you have a very small steel crochet hook, it works best. Insert it into the tube, punch it through the fabric or a stitch on the other end, and slowly ease it through, rolling the fabric on top of it. Otherwise, you can use the rubber tip of a pencil or even a safety pin. When it's right-side out, press it flat.
6. Sew a buttonhole that is appropriately sized for your button.
7. Put the lining into the knitting, fold the raw edge under between the fabric and knitting, pin them together. In the center inside back cover of the case, pull out a pin, put in the raw edge of the buttonhole flap, and re-pin to hold together. Gently fold the buttonhole flap over to the front of the case to pick a place for your button. Leave enough give for the top of the Kindle. Place a pin or something to mark where this button will go.
8. Remove only the pins holding the front of the cover to its lining and sew the button onto the knitted fabric.
9. Once your button is attached, repin the lining to the cover. Backstitch around the inside edge of the case to attach the lining. Sew as closely to the edge as possible for a neat finish.
And that's it! You should have a lined cover for your Kindle. Test it out. If it doesn't fit, determine if the cover or the lining is the problem. If it's the lining, rip out the seams and try again. If it's the cover, detatch the lining from the cover, unravel the cover and try again.
