DIY Sewn Diaper Clutch Tutorial
This is a tutorial that shows how to sew your own diaper clutch for the diaper/change bag. It finishes at about 12.5" by 9" and features:
This is not a "beginner" project -- the long zipper is very tricky to sew, as it takes a sharp curve. Familiarity with your sewing machine's basting stitches and zipper foot are highly recommended. If you have trouble with or questions about this tutorial, please contact me through the form on This Page (link opens in new window).
Also note that your clutch will look slightly different than the sample. I used a 7" zipper for the pocket of the sample, but wrote the tutorial for a 9" zipper. It simplifies the process, looks cleaner, and is easier to stitch (less bulky). These differences will be noted alongside the images below, where appropriate.
- a wide, zippered opening for easy insertion and retrieval of diapers;
- washable, cotton fabrics -- can be made from just 3 fat quarters;
- an optional zippered pouch on the front for diapering accessories like ointments and wet bags;
- an optional ribbon hanging loop.
This is not a "beginner" project -- the long zipper is very tricky to sew, as it takes a sharp curve. Familiarity with your sewing machine's basting stitches and zipper foot are highly recommended. If you have trouble with or questions about this tutorial, please contact me through the form on This Page (link opens in new window).
Also note that your clutch will look slightly different than the sample. I used a 7" zipper for the pocket of the sample, but wrote the tutorial for a 9" zipper. It simplifies the process, looks cleaner, and is easier to stitch (less bulky). These differences will be noted alongside the images below, where appropriate.
Materials
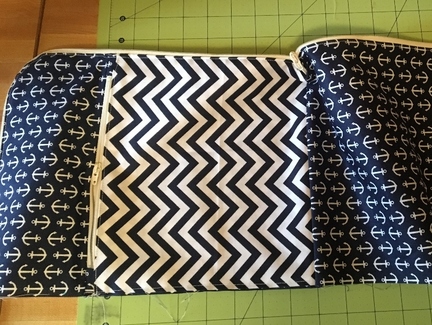
- (4) pieces cotton fabric measuring 9.5" by 13"; two cut from outer fabric, two from inner
- in the sample, the anchors fabric is the "outer" and the white fabric is the "inner"
- (1) 22" nylon zipper
- optional for hanging loop:
- (1) 6" grosgrain or satin ribbon
- optional for front pocket:
- (1) piece cotton fabric measuring 9.5" by 18.5" (in sample, chevron is the "pocket" fabric)
- (1) 9" nylon zipper, coordinating or matching long zipper
- coordinating sewing thread
- zipper foot for your sewing machine
- pins, scissors, pressing iron, pencil, etc.
1) Prepare the Pocket

Fold the pocket in half width-wise, right sides (RS) out. Press firmly. It should measure 9.5" by 9.25" now.
Align the folded edge to the TOP side of the shorter zipper, centered as best you can. There will be about 1/4" fabric past the zipper tape on either end.
Top-stitch 1/8" from the folded edge, using coordinating or matching thread and a zipper foot.
It should look like the image to the left/above. Ignore the added anchor tabs on the zipper.
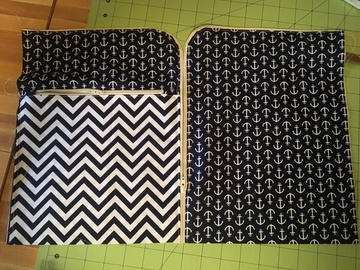
2) Prepare the Clutch Fabrics
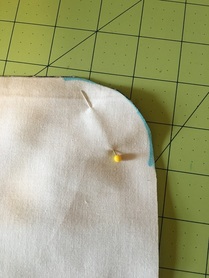
Use a circle of 3-4" diameter to trace a curve on one corner of the wrong side (WS) of one piece of the outer fabric.
Lay all four clutch pieces together (2 inner, 2 outer) with the drawn curve on top. Pin around the curve line. Then, cut.
See image to the right/above.
Lay all four clutch pieces together (2 inner, 2 outer) with the drawn curve on top. Pin around the curve line. Then, cut.
See image to the right/above.
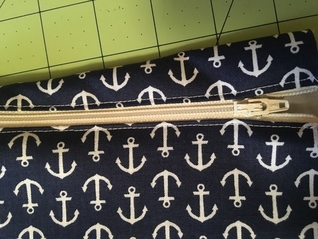
3) Stitch Pocket
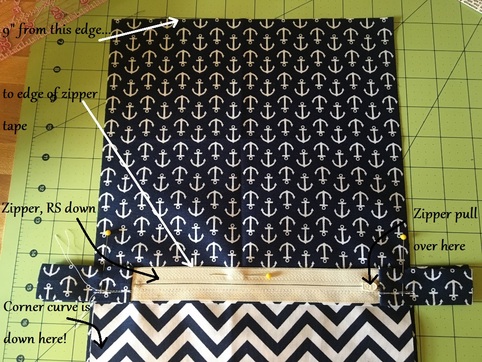
Lay one piece of outer fabric RS up with the curve at the bottom left. Lay pocket RS down with the zipper pull to the right, about 9" from the top edge.
See image above. Your zipper will not have the added tabs...
Center the zipper here, pin, and stitch with the zipper foot across the top edge of the zipper tape (where the horizontal pin is in the image).
Flip pocket over, RS up, and press very well. Then, baste the pocket to the outer fabric down each side, beginning at the zipper each time. Baste about 1/8" from the edge (see image below; again, ignore the added tabs on the zipper; your zipper will reach the outer edge of the outer fabric). If there is excess pocket fabric at the bottom, trim it flush with the outer fabric.
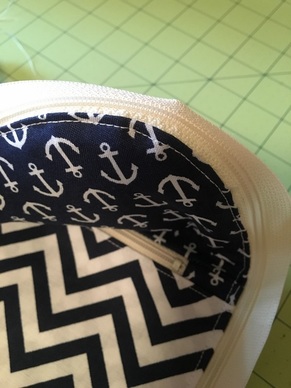
4) Stitch Long Zipper
Here is the tricky bit...
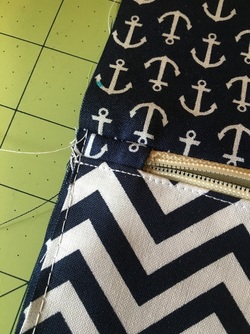
a) Lay the pocketed outer fabric RS up, then lay the long zipper RS down with the zipper pull at the top left corner (should have the curved corner at the top right). Pin along top edge. Don't bother pinning along the curve. Open the zipper completely for stitching.
Baste the zipper to this fabric with a 1/8" seam allowance. When approaching the curve, work very slowly, easing the zipper around the curve. Try not to pull it tightly (it will pucker) or let it slack too much (the fabric will gape). There will be extra zipper tape at the bottom -- this is not a problem. Once basted, it should look like the image below.
b) Lay a piece of inner fabric RS down, on top of this piece, matching the curved corners. Pin along the top edge; again, don't bother pinning the curve. Stitch these pieces together close to the zipper coils, with a zipper foot. Turn RS out and press very well. You may have excess inner fabric at the bottom; this is OK and will be trimmed later. See image below left.
Top-stitch 1/8" from pressed edge of outer fabric, easing around the curve very slowly. See image below right.
Top-stitch 1/8" from pressed edge of outer fabric, easing around the curve very slowly. See image below right.
|
|
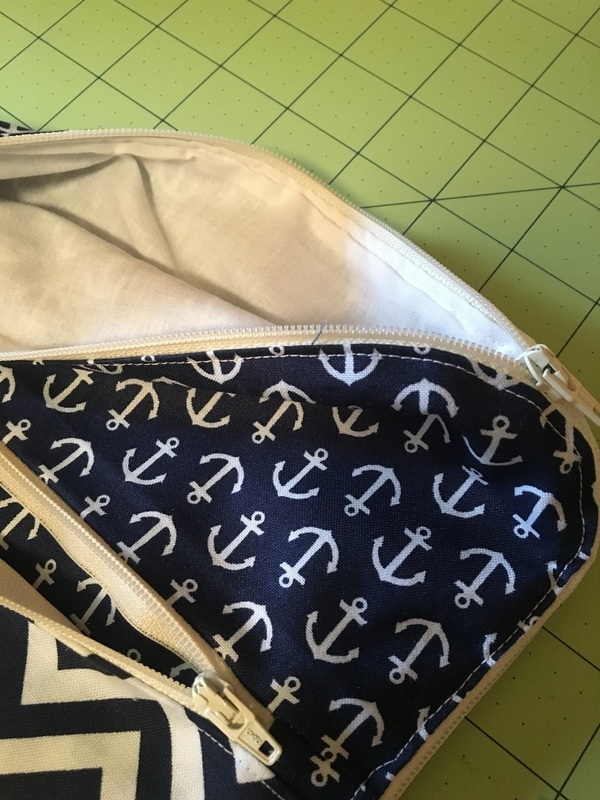
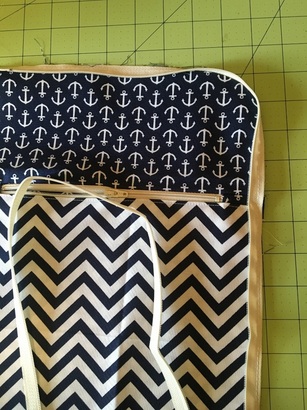
c) Lay the other inner piece RS up, then lay this zippered piece RS up on top of it. The curved corners should match up at the top right, the start of the long zipper should be at the top left. Pin along the top edge, unzip the zipper, and baste as before. See image below left.
Lay the last outer piece RS down, matching the curved corner again. Stitch these pieces together close to the coils, with a zipper foot. Turn RS out, press firmly, then top-stitch as before. See image below right.
Lay the last outer piece RS down, matching the curved corner again. Stitch these pieces together close to the coils, with a zipper foot. Turn RS out, press firmly, then top-stitch as before. See image below right.
5) Stitch Bottom Seam
The rest is pretty easy. ;)
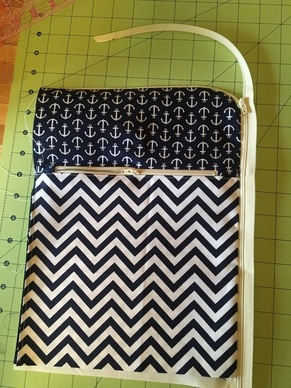
Open the zipper and lay the bag as shown in the image below, with the zipper closed a few inches. Trim any excess fabric and zipper tape from the bottom, trimming as little as possible to make a nice edge.
Open the zipper and lay the bag as shown in the image below, with the zipper closed a few inches. Trim any excess fabric and zipper tape from the bottom, trimming as little as possible to make a nice edge.
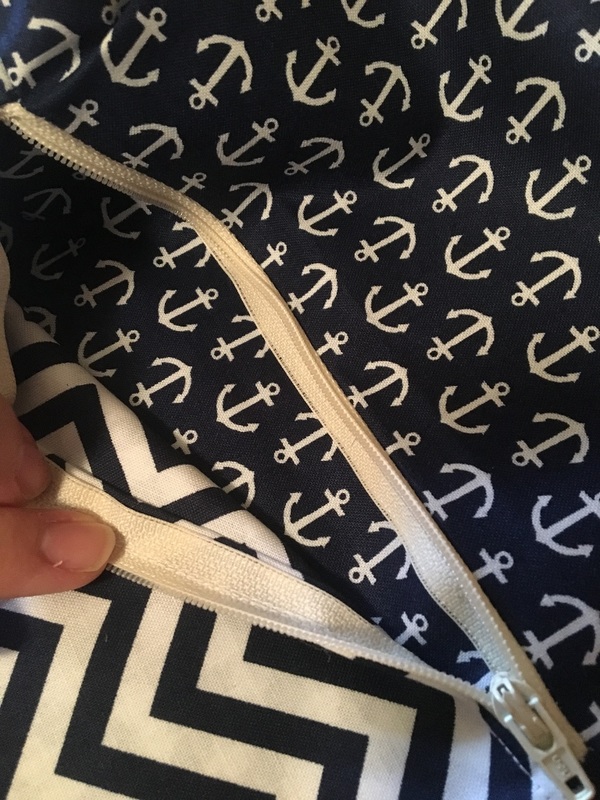
Pick up the free corners of the outer fabrics and bring them together; match the inner fabrics together as well. Pin along this entire seam. Bend the zipper tape backward and together, toward the inner fabric. See image below.
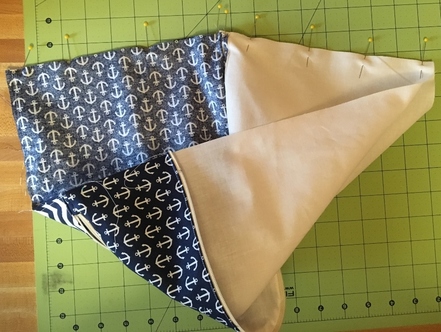
Stitch this seam with 1/4" seam allowance, moving carefully and slowly over the zipper and ensuring the zipper tape is folded toward the inner fabric.
Turn RS out and press. See image below.
Turn RS out and press. See image below.

6) Stitch Side Seam
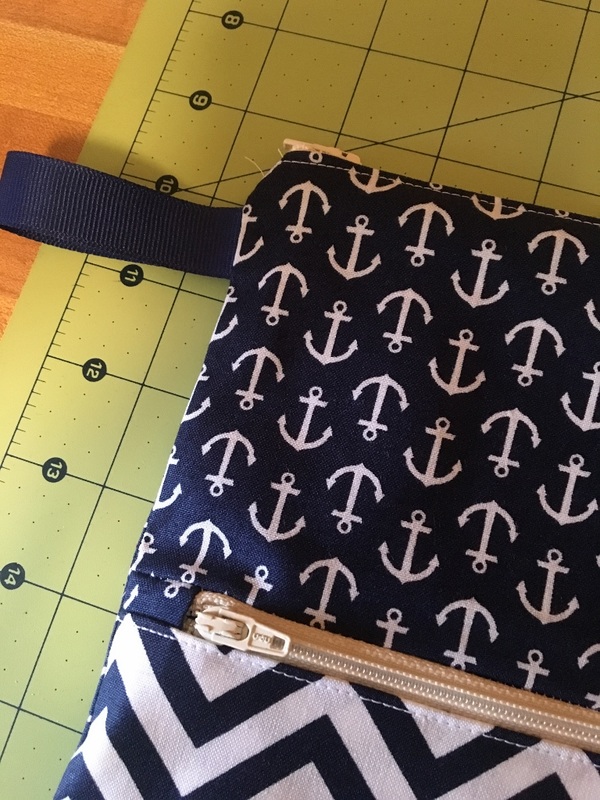
Open the long zipper fully and lay out the bag as shown in the image below. Also, open the pocket zipper partially. Your pocket zipper will not have the extra tabs sewn on; open the zipper partially to ensure the zipper pull is not in the way when sewing the side seam.
Bring the starts of the long zipper together, so that the outer fabric is RS together. Manipulate the bag so that the lining fabric is also RS together. The start of the long zipper should be positioned in the middle of this seam. Fold the zipper tape toward the inner fabric. Pin very well all along this edge.
Fold the (optional) ribbon in half. Place it near the start of the zipper between the two layers of outer fabric, with the loop tucked inside the seam. The raw edges of the ribbon should be aligned with the raw edges of the outer fabrics. Pin in place.
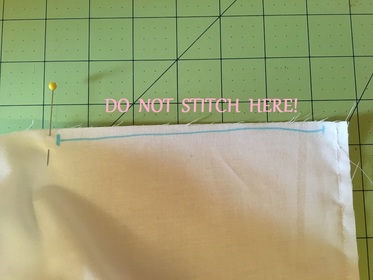
Stitch this seam with 1/4" seam allowance, leaving the last 6-7" of inner fabric seam open. See image below. I like to mark this section with a water-soluble marker, as a reminder.
Fold the (optional) ribbon in half. Place it near the start of the zipper between the two layers of outer fabric, with the loop tucked inside the seam. The raw edges of the ribbon should be aligned with the raw edges of the outer fabrics. Pin in place.
Stitch this seam with 1/4" seam allowance, leaving the last 6-7" of inner fabric seam open. See image below. I like to mark this section with a water-soluble marker, as a reminder.
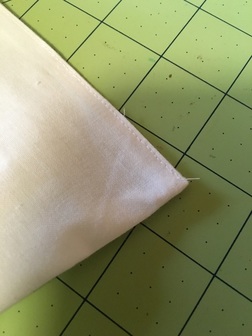
Turn the bag RS out through the opening in the seam. Use your finger to press out the corners, then press firmly with an iron.
Turn the raw edges of the opening in 1/4" and top-stitch closed, about 1/8" from the folded edges. See the image below.
Turn the raw edges of the opening in 1/4" and top-stitch closed, about 1/8" from the folded edges. See the image below.
Tuck the inner fabric into the bag and press a final time. All done!