A note to anyone using these patterns/tutorials to make things: I don't have any claim to how you use the item you make from the patterns given here. You can sell them, use them for yourself, make them as gifts, make millions and give them to charity--I don't care. My only measily request is that you please don't copy the pattern and post it as your own. Many thanks.
If you find a mistake or are having trouble with any of the instructions in the following patterns/tutorials, please do not hesitate to contact me. You can find a contact form on the "About This Girl" page.
If you find a mistake or are having trouble with any of the instructions in the following patterns/tutorials, please do not hesitate to contact me. You can find a contact form on the "About This Girl" page.
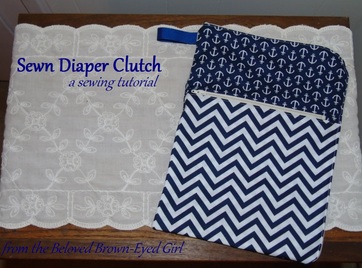
This is a tutorial for a diaper/bag clutch that goes in the diaper bag.
Features include:
Features include:
- wide-opening zipper for ease of use when both loading and removing diapers
- washable cotton fabric
- optional outer zipped pouch to hold diapering accessories like ointments and wet bags
- ribbon hanging loop
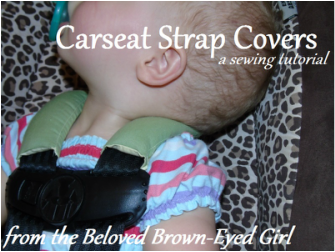
This is a tutorial for how to sew removable strap covers for your child's carseat. These covers will help protect your child's sensitive neck from the rough edge of the carseat straps. Also, they are easy to remove and wash when needed, unlike many of the commercially-available strap covers. Make them in a fabric that coordinates with your child's carseat or as a fun baby shower gift! Instead of cotton, you could use a soft flannel or minky fabric for the outside, for a special feel. :)
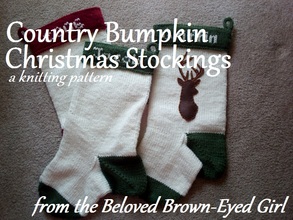
One of my husband's sisters-in-law decorates her home in a southern country theme with many antiques and handmade goodies. For many years, she has used some old crocheted Christmas stockings made by a relative. I asked her a few years ago if she'd appreciate new ones, and she was really excited about the idea. She briefly mentioned a few preferences, but gave me free reign over the design, knowing I am familiar with her style of decorating.
Two years and a couple new babies later (one her's, one mine), I finally found the motivation to get these things done.
This stocking is a two-toned, top-down sock pattern with a fold-over cuff and chunky heel and toe for that "bumpkin" look. The name and birth year (or other text of your choice) is worked in Fair Isle stranded color work on the cuff. The overall design is simple, which is what country life is all about in the South!
*** NOTICE! *** Three minor typographical errors were corrected in this pattern on August 18, 2015. If you downloaded, saved, or printed this pattern prior to 8/18/2015, please visit the link (button above) and download the corrected version. I apologize for any inconvenience!

I came up with the idea to make these because I worked a pattern similar to them in crochet over a year ago. I liked how quickly they worked up in crochet, but wanted to make a knitted version.
So I took the time today to design these and then write up the pattern. They are fairly simple to work, quick, and only require a bit of yarn. There are two styles: one has ribbing on top that holds the chapstick in and the other has a flap and button closure. Both styles are included in the pattern.
So I took the time today to design these and then write up the pattern. They are fairly simple to work, quick, and only require a bit of yarn. There are two styles: one has ribbing on top that holds the chapstick in and the other has a flap and button closure. Both styles are included in the pattern.
I've written up a basic picture tutorial of how I made a pair of underwear that are now my very favorite, including drawn diagrams. If you have any old T-shirts laying around and were wondering what to do with them, this is a great way to use them! You can make your own underwear that fit perfectly every time, and you don't have to cut up and trace a pair you already own to do it!
You can also use this tutorial to make underwear from any fabric you want. Just make sure that if you use something other than 100% cotton, you have a small piece (about a square foot) of 100% cotton knit fabric to make the lining from.
You can also use this tutorial to make underwear from any fabric you want. Just make sure that if you use something other than 100% cotton, you have a small piece (about a square foot) of 100% cotton knit fabric to make the lining from.
2nd Generation Kindle Cover w/Lining (for the Amazon Kindle)
This is a pattern/tutorial for a soft cover that will fit Amazon's 2nd Generation Kindle, although it includes instructions that should allow you to adjust for the size of your specific Kindle. This cover is meant to be decorative, protect against screen scratches, and keep the Kindle from getting dusty during periods of little use.
I had three complaints with the cover I'd made myself: (1) the fuzzies from the yarn would constantly get stuck in the edges of the screen; (2) the seed stitch band at the top was no longer attractive to me; and (3) the method of closure was cumbersome at best.
My solutions to these problems for this case included: (1) line the cover with some plain cotton muslin fabric; (2) use a decorative ribbing at the top in place of the seed stitch; and (3) create a buttoned flap closure.
You can view this tutorial/pattern (and a link for a downloadable copy!) by clicking here.
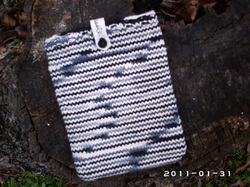
3rd Generation Kindle Cover (6" display)
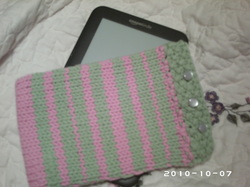
This is the "sock" or "sleeve" that I made for my Kindle. It is not perfect. The yarn I used was very fuzzy, so the fuzz would get stuck in the edge of the screen. Also, I don't care for the seed stitch border anymore. And the closure method I chose was less than desireable. I have since modified this cover (added a lining and changed the closure). The lining instructions can be found at the bottom this tutorial.
You can view this tutorial (and a link for a downloadable copy!) by clicking here.
You can view this tutorial (and a link for a downloadable copy!) by clicking here.
Crochet Makeup Bag Pattern
This makes a pretty good makeup bag. You could also use it as a skein holder when crocheting or knitting. You can find the pattern (and a link for a downloadable copy!) by clicking here.
